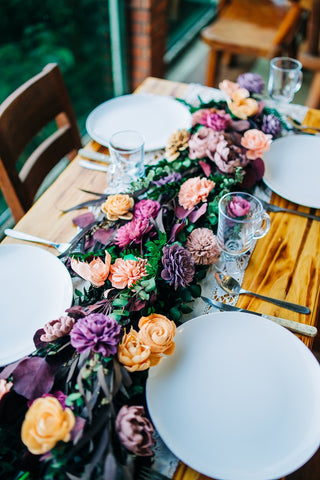
DIY GARLAND CENTERPIECE - SOLA WOOD FLOWERS
A delightful garland centerpiece with lush preserved greenery and a generous display of sola wood flowers in various shades of purple, peach, and pink.

Eucalyptus used in this spread has been preserved to retain its natural scent, adding a relaxing and welcoming element to this setting.
Impress your guests with a lovely tablespace. Learn how to make these flower arrangements with our easy to follow tutorial below.
Floral Supplies and Tools Needed

- Sola Wood Flowers
- Leather Ferns
- Boxwood leaves
- Eucalyptus Leaves
- Cutting Shear
- Glue Gun
- Floral Tape
- Floral Wire
- Sola Dye
- Sola Softener
[[supplies]]

STEP 1: Dye the Sola Wood Flowers

Pour water into a bowl. Add the sola softener and dye. Stir thoroughly.

Dip-dye the flowers. Let them dry for at least 24 hours.
Check out this How To Dye Sola Wood Flowers tutorial. You will learn the basic steps of using sola dye to color the flowers.

STEP 2: Stem the Sola Wood Flowers
Grab a floral wire and apply hot glue to the tip. Carefully push into the base of the flower and hold for a second. Let the glue dry and make sure the flower is firmly attached to the stem.


Learn how to stem sola wood flowers like a pro in this Tutorial.
STEP 3: Build Greenery Bundles
Create bundles that incorporate all of the greenery.


STEP 4: Add Flowers to the Greenery
Once you have the greenery set, tie the sola wood flowers to the bundle.


STEP 5: Complete the Bouquet Bundles
 Complete the needed bundles to fill the whole length of the table.
STEP 6: Set the Garland


[[supplies]]
